Herringbone Laminate Flooring Installation Guide
Scope of This Installation Guide
Laminate herringbone flooring is a decorative click-lock flooring system designed to create a traditional herringbone pattern using interlocking laminate planks. Unlike standard straight-lay laminate, herringbone flooring relies on precise plank orientation and correct sequencing to achieve a clean, stable finish.
This guide explains how to install laminate herringbone flooring as a floating floor, using a click locking system without adhesive. It is written to provide clear, practical guidance that can be followed on site, whether you are a confident DIY installer or a professional fitter.
Herringbone installation differs from standard plank laminate in several important ways. The pattern involves a higher number of joints, greater reliance on short-end locking accuracy, and a defined installation sequence that must be followed from the start. Because of this, accurate set-out, correct plank orientation, and careful joint engagement are critical.
If you are installing standard straight-lay click laminate flooring, please refer to our dedicated Laminate Flooring Installation Guide, as the set-out and fitting sequence differs from herringbone systems.
This guide places particular emphasis on:
- Proper planning and layout before installation begins
- Accurate sequencing of planks during installation
- Subfloor preparation and flatness, which are more critical for herringbone patterns than for straight-lay laminate
When installed correctly, laminate herringbone flooring will sit flat, remain stable, and maintain a clean, consistent pattern over time.
Installation Guide Contents
- 1. Tools Required
- 2. Subfloor Preparation & Flatness Requirements
- 3. Underlay Requirements
- 4. Expansion & Movement Rules
- 5. Understanding the Herringbone Planks (A / B Boards)
- 6. Dry Layout & Set-Out
- 7. Installing the Herringbone Pattern
- 8. Short-End Locking Method (Non Drop-Lock Joints)
- 9. Finishing & First Use
- 10. Common Mistakes to Avoid
- 11. Frequently Asked Questions – Installation & Performance
- 12. Helpful Videos & Visual Guides
1. Tools Required
Before starting the installation, ensure you have the following tools and materials available:
Essential Tools
These tools are required for most laminate flooring installations:
- Tape measure and pencil – for accurate measuring and marking
- Utility knife or laminate cutter – for trimming underlay and boards
- Saw (handsaw or electric) – for cutting boards to length
- Spacers – to maintain the required expansion gap
- Tapping block – for tightening click joints without damaging edges
- Rubber mallet – used with the tapping block only
- Pull bar – for securing boards near walls or in tight spaces
Additional Tools (Where Required)
These tools may be required depending on the room layout and subfloor type:
- Jigsaw or hole saw – for cutting around pipes, steps, or awkward shapes
- Combination square – for marking accurate straight and angled cuts
- Moisture meter – recommended for concrete subfloors
- Knee pads and safety eyewear – for comfort and protection during installation
- Chalk line or laser level (recommended for accurate set-out)
- Square and straight edge
Having the correct tools ready before installation begins will help maintain accuracy, prevent damage to the locking system, and ensure the herringbone pattern is laid cleanly and consistently.
2. Subfloor Preparation & Flatness Requirements
Before installing laminate herringbone flooring, the subfloor must be properly prepared. Herringbone patterns place greater stress on joints than standard plank laminate, making subfloor condition especially important.
The subfloor must be:
- Clean – free from dust, debris, paint, or adhesive residues
- Dry – moisture levels must be within acceptable limits for laminate flooring
- Stable – no movement, flexing, or loose areas
- Flat – suitable for a floating click system
Why flatness is critical for herringbone
Herringbone laminate flooring has:
- A higher number of joints than straight-lay plank floors
- Greater reliance on short-end locking accuracy
Any unevenness in the subfloor can lead to joint stress, poor locking, or visible gaps during installation.
Flatness tolerance
- The subfloor should be flat to within 2mm over a 1 metre straight edge, unless the flooring manufacturer specifies a tighter tolerance.
- Tighter tolerances may be required for some herringbone systems.
Preparing the subfloor
- Use a suitable levelling compound to correct low spots or uneven areas.
- Allow all levelling products to cure fully before installation.
- Do not install laminate herringbone flooring over uneven or unstable substrates.
Taking the time to prepare the subfloor correctly will significantly improve the final appearance and long-term performance of the floor.
3. Underlay Requirements
Selecting the correct underlay is critical for the performance of laminate herringbone flooring.
- Use a firm, high-density underlay specifically designed for laminate flooring.
- Do not use soft or compressible underlays, as these allow excessive movement underfoot and can place stress on the locking joints.
- Underlay thickness should be no more than 3mm, unless the flooring manufacturer states otherwise. (Thicker underlays increase vertical deflection and can lead to joint stress in herringbone layouts.)
Underfloor heating
- Where underfloor heating is present, use a low-tog, UFH-approved underlay only.
- Ensure the combined tog value of the underlay and flooring does not exceed the system limits.
Using the correct underlay helps maintain joint integrity, reduces unwanted movement, and ensures the floor performs as intended over time.
4. Expansion & Movement Rules
Laminate herringbone flooring must be installed with adequate expansion space to allow for natural movement caused by changes in temperature and humidity.
Perimeter expansion
- Maintain a minimum 10mm expansion gap around the entire perimeter of the room.
- Expansion gaps are required around:
- Walls
- Door frames and architraves
- Columns, pipework, and other fixed objects
Doorways and multiple rooms
- An expansion break is recommended at doorways, as this is the most common point where movement can be restricted.
- Laminate herringbone flooring can be installed continuously between rooms, but particular care must be taken to ensure adequate expansion space is maintained.
- Where rooms experience different levels of use, heating, or temperature, movement may occur at different rates.
- If movement issues later develop at a doorway, a relief cut and threshold profile can usually be installed to allow the areas to move independently.
Maximum run lengths
- Laminate herringbone flooring should not exceed the following dimensions without an expansion break:
- Up to 12 metres in one direction
- Up to 8 metres in the perpendicular direction
- If these dimensions are exceeded, an expansion break must be installed.
- Always confirm the maximum permitted run length in the product-specific installation instructions, as this can differ.
Internal expansion breaks
- In larger areas, internal expansion breaks may be required.
- Expansion breaks are typically formed using a suitable transition profile.
- Where required, allow a wider expansion gap (typically 20mm) at internal breaks.
Fixed Furniture and Kitchen Units
- Laminate herringbone flooring must not have fixed furniture or kitchen units installed on top of it.
- Fixed items such as:
- Kitchen units
- Kitchen islands
- Built-in wardrobes or cupboards must be independent of the flooring and must not restrict its ability to expand and contract.
- Maintain a minimum 10mm expansion gap around all fixed furniture and units.
- In kitchens, the expansion gap is normally hidden by the kitchen plinth, allowing the floor to move freely underneath.
- Do not screw, pin, or bond fixed furniture through the flooring, as this will restrict movement and may cause the floor to fail.
5. Understanding the Herringbone Planks (A / B Boards)
Laminate herringbone flooring uses two different plank orientations, commonly referred to as left-hand (A) and right-hand (B) boards.
- Each plank type is mirrored and cannot be used interchangeably.
- Before starting the installation:
- Identify the plank orientation
- Separate A and B boards into clear stacks
- Always install planks in the correct sequence to maintain the herringbone pattern.
- Never mix plank orientation incorrectly, as joints will not lock and the pattern will not align.
Before committing to the installation, dry-lay several boards to confirm the pattern logic and ensure you are familiar with how the planks fit together.
6. Dry Layout & Set-Out
Accurate set-out is critical when installing laminate herringbone flooring. Time spent planning at this stage will prevent alignment issues later in the installation.
- Establish a primary reference line through the room.
- This line must run through the centre of the top and bottom planks — not the outer tip of the herringbone triangle. (See diagram.)
- While some installers reference the triangle tip, using the plank body centre line provides more consistent alignment and reduces the risk of cumulative pattern drift.
- Dry-lay the starting herringbone pattern along the reference line to confirm orientation.
Before locking any boards together, check:
- Symmetry across the room
- Cut sizes at walls, avoiding narrow slivers where possible
- Overall pattern alignment
If adjustments are required, make them at this stage.
Do not begin locking boards together until the layout has been confirmed.
7. Installing the Herringbone Pattern
This section explains the step-by-step installation method for laminate herringbone flooring using a floating click system.
The installation process uses a starter triangle method, which establishes the correct plank orientation and creates a straight reference edge from which the herringbone pattern is built. Each step in this section corresponds directly to the installation diagrams shown.
Follow the steps in order and complete each stage before moving on. Accuracy during the early stages of installation is critical, as any errors will be repeated across the floor.
DPM, Underlay and Moisture Control
- Ensure the subfloor is clean, dry, and structurally sound before installation.
Typical accepted moisture limits (Carbide Method) are:
-
- ≤ 2.0 CM% for sand/cement screeds without UFH
- ≤ 1.8 CM% for sand/cement screeds with UFH
- ≤ 0.5 CM% for anhydrite / calcium sulphate screeds
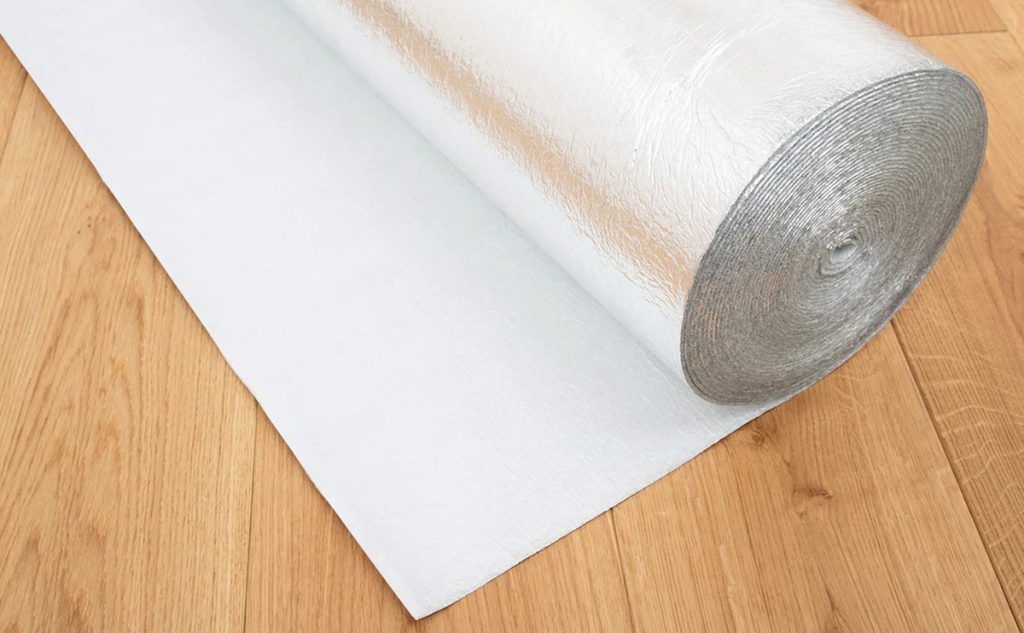
- Where required, install a suitable DPM (moisture barrier).
- Lay the DPM flat over the subfloor and seal all joints with waterproof vapour tape to maintain a continuous moisture barrier.
- Turn the DPM up the walls by approximately 30mm to prevent moisture bypassing at the perimeter.
- Lay the underlay on top of the DPM, ensuring it lies flat with no folds or creases.
- Butt underlay edges tightly together — do not overlap unless using an underlay with an integrated DPM overlap system.

Plank Orientation & Fitting Sequence
- Laminate herringbone planks must be installed in a specific sequence so that the groove edges face outward as the pattern is built.
- A and B planks are designed to work together to form the herringbone layout and cannot be used interchangeably.
- Pay close attention to the header joints where planks meet. Ensure the tongue and groove profiles align exactly as shown in the diagram indicators.
- To create the starter triangle, arrange three A (left-hand) planks and two B (right-hand) planks into the staircase formation shown.
Incorrect orientation at this stage will prevent boards from locking and disrupt the entire installation sequence.

Angling & Clicking Boards Together
- Position the next plank at a shallow angle to the previously installed board.
- Engage the locking profile while angled, then lower the plank carefully.
- Confirm joint alignment using the reference images:
-
- Correct ✔: Boards sit fully flush with no visible step or gap
- Incorrect X: A visible step or misalignment indicates the plank is not seated correctly
- Do not force boards together from above or attempt to slide them flat into position.
- If the joint does not close fully, stop and check orientation and ensure the locking profile is free from debris.

Engaging the Long-Edge Lock
- Offer the plank to the adjoining board at a shallow angle (approximately 10–15°).
- Engage the long-edge locking profile fully while angled.
- Lower the plank until it lies completely flat.
- A correctly engaged long-edge joint will sit flush along the full length of the board.

Completing the Starter “V” Assembly
- Position the opposing plank at a shallow angle and engage the long-edge lock.
- Lower the plank until the joint locks fully and sits flat.
- Ensure the internal corner of the “V” is tight and fully closed, with no visible gap at the apex.
- Check that both sides of the starter section are aligned.
This completes the initial herringbone “V” and establishes the correct orientation for the remainder of the installation.

Marking the Starter Triangle (Temporary A Board)
- Click an additional A board onto the end of the top B board, as shown in the top half of the diagram.
- This board is temporarily engaged and serves only as a guide to establish a straight reference edge.
- Using the inner corner of the temporary A board and the outer corner of the A board on the opposite side as reference points, align a straight edge between these points and mark a straight cut line across all boards.
- Once marked, remove the additional A board. It is not fixed and does not form part of the installed floor.
Do not proceed to cutting until the line has been checked for straightness and accuracy.

Trimming the Starter Triangle
- Cut along the marked line using a fine-tooth saw or laminate cutting tool.
- Ensure all joints remain fully engaged and the assembly does not shift during cutting.
- After trimming, check that the new edge is straight and the starter triangle sits flat.
This trimmed edge now forms the straight reference edge for continuing the installation.
Note:
Offcuts with intact locking profiles are often reused later for perimeter finishing. Set these aside rather than discarding them.

Fitting Triangle Pieces Along the Wall
- Position the starter triangle along the starting wall and balance the pattern across the room, measuring equally from the side walls as shown.
- Fit additional triangle infill pieces to complete the pattern along the wall edge.
- Maintain a 10mm expansion gap using spacers at all contact points.
- Ensure all pieces are fully locked, sit flat, and form a straight line.

Measuring Perimeter Gaps
- Where a full starter triangle will not fit (typically at room corners), measure the remaining gap labelled “a” in the diagram.
- Measure from the edge of the last installed triangle to the wall, measuring to the face of the spacers to allow for the 10mm expansion gap.
- Confirm that the board being marked (A or B) matches the sequence required to fill that specific position.

Marking and Cutting Reduced Triangle Pieces
- Transfer measurement “a” onto a full starter triangle.
- Using a square or sliding bevel, mark a straight vertical cut line, square to the reference edge.
- Cut along the marked line to create the reduced triangle piece.
- Fit the piece into position, ensuring it locks fully into the existing pattern without forcing.
- Check that the piece fits cleanly while maintaining the 10mm expansion gap.

Completing the Remaining Triangle Infill Pieces
- Continue the same measuring and cutting process to fill the remaining triangular gaps along the starting wall.
- Confirm the correct A/B orientation before fitting each piece.
- Offer each reduced triangle at a shallow angle to engage the locking profile, then lower it carefully into position.
- Where space is limited near the wall, use a pull bar and light, controlled taps to close the joint fully without disturbing the spacers.
- Maintain a consistent 10mm expansion gap along the wall.
- Ensure all infill pieces are fully locked, sit flat, and form a straight, continuous reference edge.

Continuing the Main Field Using B Boards
- Once the wall-edge triangle pieces are secured with spacers, begin extending the pattern into the room using B boards.
- Offer each board at a shallow angle (approximately 10–15°) to engage the click system.
- Lower the plank until it locks fully and sits flat on the subfloor.
- Continue following the established A/B sequence, ensuring the pattern remains tight and consistent.
- Check that the expansion spacers along the starting wall remain in position during this stage.

Measuring, Cutting and Fitting B Boards at the Wall
- Measure the remaining gap “a” between the last installed board and the wall spacer.
- Use a sliding bevel to capture the wall angle where walls are not perfectly square.
- Transfer both the measurement and angle onto the B board.

Cutting Mitred End Pieces
- Once the length is established, use the sliding bevel to mark the 45° (or site-specific) mitre line across the face of the board.
- Mark the cut line clearly from the corner of the plank cut line.
- Ensure the orientation of the mitre matches the existing herringbone "V" shape so the pattern remains continuous.
- Cut along the marked line and dry-fit the piece to ensure a flush joint before clicking it into the floor.

Continuing the Herringbone Pattern Across the Floor
- Continue laying the herringbone pattern across the room in the direction shown.
- Maintain the established A/B sequence throughout.
- Regularly check alignment against the original reference edge using a straight edge, string line, or laser.
- Ensure expansion spacers around the perimeter remain tight and correctly positioned.

Fitting Around Door Frames and Architraves
-
There are two acceptable methods for fitting around door frames. Both must maintain the expansion gap.
Option 1 – Undercut (Recommended)
- Undercut the door frame using a flush-cut saw and a scrap piece of flooring.
- Slide the flooring underneath so the cut edge is hidden.
- Maintain a 10mm expansion gap beneath the frame.
Option 2 – Cut Around
- Scribe and cut the flooring to fit neatly around the architrave.
- Maintain a 10mm expansion gap, later covered with a suitable trim or flexible finishing solution.
Important: Regardless of the chosen method, the flooring must never be fixed tight or pinned to the door frames, as this will cause the floor to buckle.

Removing Spacers and Finishing the Perimeter
- Once installation is complete, remove all expansion spacers from around the perimeter.
- Fit skirting boards or scotia (beading) to cover the 10mm expansion gap.
- Fix all trims to the wall only, never to the flooring, so the floor can expand and contract freely.

8. Short-End Locking Method (Non Drop-Lock Joints)
Many laminate herringbone floors use a short-end locking system that does not drop into place. In these cases, the short-end joint must be closed carefully to avoid damaging the locking profile.
If the short end does not use a drop-lock system:
- Angle the new plank into position on the long edge first.
- Slide the short end as close as possible to the adjoining plank.
- With the plank lying flat:
- Use a tapping block or pull bar against the solid mating edge of the plank, not against the thin groove lip.
- Apply controlled, light taps to close the short-end joint.
- Ensure the joint is fully closed, with no visible gap along the short end.
- Never strike the plank directly with a hammer or apply force to the fragile groove edge.
This method allows the short-end joint to be closed correctly while protecting the locking system from damage.
9. Finishing & First Use
Once the laminate herringbone flooring has been fully installed, the final stage focuses on securing trims correctly and preparing the floor for first use.
- Fit skirting boards and trims to the walls only, never to the flooring.
- Install door bars and transition profiles where required, ensuring they do not restrict natural floor movement.
- Remove all expansion spacers once perimeter trims are secured and confirm that movement gaps remain clear.
- Avoid placing heavy furniture immediately; position items carefully and lift rather than drag them across the surface.
- Fit protective pads to furniture legs to reduce surface wear.
For day-to-day cleaning, spill handling and long-term maintenance, see our laminate flooring care and cleaning guide.
10. Common Mistakes to Avoid
Avoiding the following issues will help ensure a clean installation and long-term performance of laminate herringbone flooring:
- Incorrect A / B plank sequencing
Mixing plank orientation or breaking the fitting sequence will prevent joints from locking correctly and cause the pattern to misalign. - Poor subfloor flatness
Uneven subfloors place stress on the locking system and can lead to gaps, movement, or joint failure. Herringbone patterns are less forgiving than straight-lay laminate. - Using soft or compressible underlay
Soft underlays allow excessive vertical movement, which increases stress on joints and can cause separation over time. - Rushing the starting layout
Inaccurate set-out at the start of the installation will be repeated across the floor. Always confirm alignment and symmetry before locking boards together.
- Forcing short-end joints closed
Forcing joints can damage the locking profile. If a joint will not close, stop and check alignment, orientation, and obstructions. - Installing continuously across multiple rooms without allowing for expansion
Doorways are common pressure points. Where expansion is restricted, movement issues are more likely to occur. - Attempting to lock boards when the joint is obstructed
If a board will not lock fully or a gap remains, do not force it.
Check for debris such as dust, dirt, or excess wood fibres in the groove, remove any obstruction, and try again. - Skipping the Moisture Test: Failing to verify subfloor moisture (particularly with calcium sulphate / anhydrite screeds) can lead to peaking, swelling, or joint stress — even if the floor appears sound immediately after installation. Always confirm moisture levels are within the flooring and underlay manufacturer’s specified limits.
11. Frequently Asked Questions (FAQs)
Laminate herringbone flooring is less forgiving than standard plank layouts, so small mistakes can have bigger consequences. This FAQ section addresses the most common technical and practical questions that arise during installation, based on real-world fitting issues and manufacturer guidance. These answers are intended to support correct installation and help avoid avoidable failures.
In most cases, no. Laminate herringbone flooring is designed for floating installation using a click-lock system and does not require adhesive.
However, certain manufacturers may specify joint gluing for specific locking profiles or product ranges. Always follow the installation instructions supplied with the individual flooring product, as adhesive requirements vary by manufacturer and joint design.
For laminate herringbone installations, an allowance of approximately 15% for wastage is recommended. This is higher than the typical 5–10% allowance for straight-lay planks.
Because the herringbone pattern meets perimeter walls at 45° angles, most edge boards require precision cutting. This generates triangular offcuts that are not always reusable. Allowing 15% helps maintain pattern symmetry and accounts for complex cuts around doorways, recesses and alcoves.
Yes, provided the product is approved by the manufacturer for use with underfloor heating.
Key requirements typically include:
- Use of a low-tog, UFH-approved underlay
- Ensuring the combined tog value of flooring and underlay remains within system limits
- Switching the heating system off during installation
- Recommissioning the heating gradually after installation
Rapid temperature fluctuations or excessive surface temperatures may lead to movement-related issues.
Continuous installation is possible, but careful planning is required.
Doorways are common pressure points where movement may become restricted. Expansion breaks are strongly recommended at thresholds, particularly where:
- Room sizes differ significantly
- Environmental conditions vary
- Maximum permitted run lengths are exceeded
Where expansion is restricted, movement-related issues are more likely to develop over time.
Visible gaps are typically caused by one or more of the following:
- Incorrect A/B plank sequencing
- Debris or fibres within the locking profile
- Insufficient subfloor flatness
- Use of soft or excessively thick underlay
- Incomplete engagement of the click mechanism
If a joint does not close fully, do not force it. Remove the board, clean the locking profile, confirm correct orientation, and re-engage carefully.
Replacement is possible, but more complex than with straight-lay laminate.
Due to the interlocking herringbone pattern, individual boards cannot usually be removed in isolation. In most cases, flooring must be lifted back to the nearest wall or expansion break to access the affected plank.
For this reason, retaining spare boards after installation is strongly recommended.
No. Laminate herringbone flooring must remain free-floating at all times.
Fixed elements such as:
- Kitchen units
- Kitchen islands
- Built-in wardrobes
must be installed independently of the flooring. The laminate should be fitted around these elements, maintaining the required expansion gap.
Restricting floor movement by fixing furniture through the flooring can result in buckling, joint stress or system failure.
12. Helpful Videos & Visual Guides
This guide is written to be followed step by step, but laminate herringbone installation benefits from visual reference — particularly for plank orientation, starter layout, and correct joint engagement.
The videos below are intended as visual support only. Always prioritise:
- the flooring manufacturer’s installation instructions
- the expansion and movement rules in this guide
- the correct A/B plank sequence and reference-line set-out
Videos should never be used as a replacement for the written instructions above.
Full Guide: Installing Herringbone Laminate Flooring
Helpful for:
- understanding the full installation sequence from preparation to final perimeter cuts
- visualising centre-line set-out and starter triangle assembly
- seeing how rows are extended once the baseline is established
- observing correct cutting methods around obstacles and along walls
This video provides a practical visual overview of the complete herringbone laminate installation process using a floating click system. It follows the logical sequence covered in this guide, including underlay installation, centre-line marking, construction of the starter triangles, and extending the pattern across the room.
Particular attention should be paid to:
- establishing the correct centre reference line (through the body of the planks, not the triangle tips)
- assembling the starter triangle accurately before trimming
- maintaining consistent expansion gaps at all perimeter edges
- cutting end pieces and back-wall sections without restricting floor movement
This video is intended as visual reinforcement of the written instructions above. Always prioritise:
- the product-specific manufacturer’s installation guidance
- the expansion and movement rules outlined in this guide
- correct A/B plank sequencing throughout installation
Short-End Locking on Non Drop-Lock Systems (Short Video Explanation)
Helpful for:
- closing short-end joints on 4-sided click systems
- using a tapping block or pull bar correctly
- preventing damage to the groove edge
- avoiding joint misalignment when tapping
This short video demonstrates how to close short-end joints on laminate click systems that use identical locking profiles on all four sides and do not incorporate a drop-lock mechanism.
Where the short-end joint does not close automatically when lowered flat:
- Engage the long edge first.
- Position a tapping block or pull bar against the solid outer edge of the board — never against the thin groove lip.
- Apply light, controlled taps to bring the short-end joint fully closed.
- Once the joint is flush, stop tapping immediately to avoid displacing adjacent boards.
Excessive force or incorrect block positioning can damage the locking profile and compromise joint integrity. This method should be carried out carefully and only as required.
Final Notes & Installer Responsibility
Laminate herringbone flooring is a precision-based installation. The accuracy of the initial set-out, correct A/B sequencing, subfloor flatness and adherence to expansion rules will determine the long-term performance of the floor.
This guide provides practical, UK-relevant installation guidance for floating click systems. However, it does not replace the manufacturer’s product-specific installation instructions. Locking profiles, run-length allowances, moisture tolerances and underlay requirements may vary between products.
Before installation:
- Confirm the flooring is suitable for the intended environment.
- Verify subfloor moisture levels using approved testing methods.
- Check manufacturer guidance for maximum run lengths and movement allowances.
- Ensure all materials are acclimatised in accordance with product instructions.
Failure to follow manufacturer instructions or to provide adequate movement allowance may result in joint stress, peaking, separation or floor failure.
Correct preparation and careful installation will ensure the herringbone pattern remains stable, aligned and visually consistent for years to come.
Ready to Choose Your Laminate Herringbone Flooring?
Explore our range of click laminate flooring, including classic straight plank and herringbone designs. Durable, low-maintenance and suitable for busy UK homes, with fast nationwide delivery.
About Floor Warehouse
Floor Warehouse is a UK-based flooring specialist with over 15 years of combined industry experience in sourcing, selling, and advising on wood, laminate, SPC, and LVT flooring. Our expert advice is written to help homeowners, designers, and trade professionals make informed flooring decisions — from installation and maintenance to underfloor heating compatibility, sustainability, and long-term performance. All guidance is based on real-world product knowledge, manufacturer standards, and common questions we see every day from customers across the UK.
View all posts by Floor Warehouse