

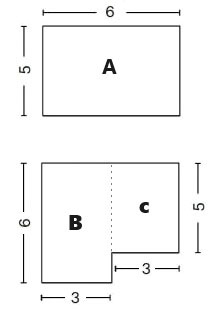
Ultimate Guide to Measuring Your Room for Flooring – Step by Step


Related Posts

Herringbone Laminate Flooring Installation Guide
Installing laminate herringbone flooring is straightforward with careful planning. Follow clear steps for a stable, well-aligned and professional finish.

Glue-Down Luxury Vinyl Flooring (LVT) with Underfloor Heating
Considering glue-down LVT with underfloor heating? This guide explains how it performs, what preparation is required, and the temperature limits that must be followed.

PEFC Flooring: What Most Homeowners Get Wrong — And What Really Matters When Choosing Sustainable Wood
Sustainable flooring isn’t just about a logo on the box. We break down common PEFC myths and what homeowners should really look for.

Solid Wood Flooring Installation: Nail-Down & Glue-Down Guide
Solid wood flooring needs careful planning and precision. Learn the correct preparation and installation methods for long-lasting results.

How to Care for Laminate Flooring – Cleaning & Maintenance Guide
Laminate floors are easy to live with—but only if maintained correctly. Learn how to clean, protect, and prevent everyday damage.

Caring for Wood Flooring – Engineered & Solid Wood Maintenance Guide
Wood floors age best with the right care routine. Learn how to maintain engineered and solid wood without damaging the finish.

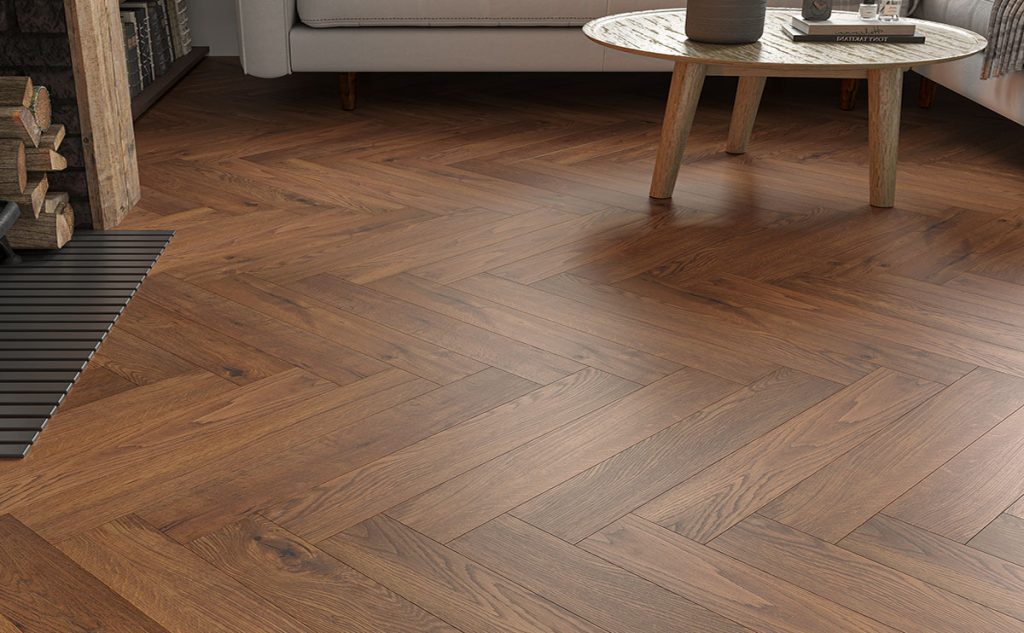
What is Parquet Flooring? Types Explained (Plus Real-Life Tips)
Parquet flooring comes in more styles than most people realise. Explore popular patterns and practical tips before choosing.

Is LVT Better Than Laminate? This Is What You Need to Know.
LVT and laminate both have clear advantages. We compare performance, water resistance, and suitability for real homes.

Choosing the Right Laminate Flooring for You
Choosing laminate flooring isn’t just about colour. Learn what thickness, ratings, and room use really mean in practice.

Factors Influencing Engineered Wood Flooring Costs
Engineered wood flooring prices vary for good reason. Understand what affects cost—from construction to finishes and materials.
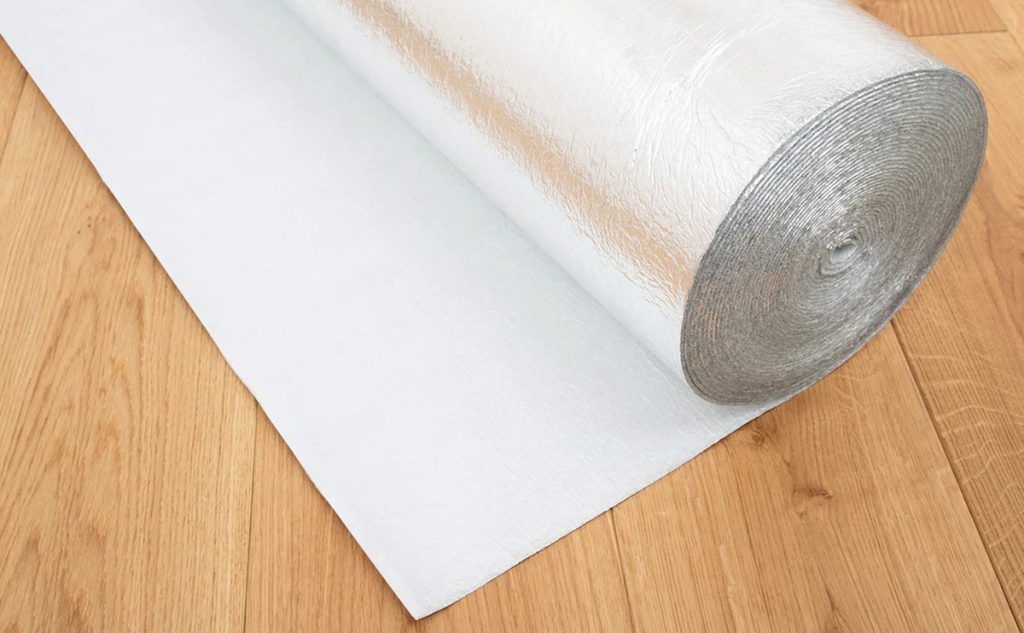
Flooring Underlay: Types, Benefits, and Installation Tips
Underlay plays a bigger role than many expect. Learn which type to use and how it improves comfort and performance.
Laminate vs Alternatives: Which Flooring Is Right for You?
Laminate competes with wood, vinyl, and tile. Compare popular flooring options based on lifestyle, budget, and room type.
 White
White
 Invisible
 Natural
 Golden
 Brown
Brown
 Grey
Grey
 Black
Black
